
Contents
- Introduction
- Background
- Goals
- Prerequisites
- Auto-starting Services with System V
- Auto-start Checklist for System V
- Step 1 — Connecting to Your Debian 6 Droplet
- Step 2 — Installing MySQL
- Step 3 — Configuring MySQL to Auto-start After Reboot
- Step 4 — Configuring MySQL to Auto-start After Crash
- Auto-starting Services with Upstart
- Auto-start Checklist for Upstart
- Step 1 — Connecting to Your Ubuntu 14.04 Droplet
- Step 2 — Installing MySQL
- Step 3 — Configuring MySQL to Auto-start After Reboot
- Step 4 — Configuring MySQL to Auto-start After Crash
- Auto-starting Services with systemd
- Auto-start Checklist for systemd
- Step 1 — Connecting to Your CentOS 7 Droplet
- Step 2 — Installing MySQL
- Step 3 — Configuring MySQL to Auto-start After Reboot
- Step 4 — Configuring MySQL to Auto-start After Crash
- Conclusion
Introduction
This tutorial shows you how to configure system services to automatically restart after a crash or a server reboot.
The example uses MySQL, but you can apply these principles to other services running on your server, like Nginx, Apache, or your own application.
We cover the three most common init systems in this tutorial, so be sure to follow the one for your distribution. (Many distributions offer multiple options, or allow an alternate init system to be installed.)
-
System V is the older init system:
- Debian 6 and earlier
- Ubuntu 9.04 and earlier
- CentOS 5 and earlier
-
Upstart:
- Ubuntu 9.10 to Ubuntu 14.10, including Ubuntu 14.04
- CentOS 6
-
systemd is the init system for the most recent distributions featured here:
- Debian 7 and Debian 8
- Ubuntu 15.04
- CentOS 7
You can also check out Part 2, the reference article.
Background
Your running Linux or Unix system will have a number of background processes executing at any time. These processes – also known as services or daemons – may be native to the operating system, or run as part of an application.
Examples of operating system services:
- sshd daemon that allows remote connections
- cupsd daemon that controls printing
Examples of application daemons:
- httpd/apache2 is a web server service
- mongod is a database daemons
These services are supposed to run continously to make sure our websites, mail, databases, and other apps are always up.
As administrators, we want our Linux services to:
- Run continuously without failing
- Start automatically after the system reboots or crashes
Yet, sometimes, these services go down, making our websites or apps unavailable.
A reboot can happen for many reasons: it can be a planned restart, the last step of a patch update, or the result of unexpected system behavior. A crash is what happens when the process stopping unexpectedly or becomes unresponsive to user or application requests.
The goal of this article is to get your services up and running again, even after a crash or reboot.
Although there's no substitute for continuous monitoring and alerting, Linux services can be made largely self-healing by changing the way they are handled by service management daemons, also known as initsystems.
There is no single way to do this: it all depends on the particular Linux distribution and the service management daemon that comes with it. The default init systems for many common operating systems are shown in the introduction above.
We'll go into more detail about runlevels in Part 2, but for this article, it'll help to understand that every Linux system has four basic runlevels in common:
- 0 – Runlevel 0 means system shutdown
- 1 – Runlevel 1 means single-user, rescue mode
- 5 – Runlevel 5 means multi-user, network enabled, graphical mode
- 6 – Runlevel 6 is for system reboot
In general, runlevels 2, 3 and 4 mean states where Linux has booted in multi-user, network enabled, text mode.
When we enable a service to auto-start, we are actually adding it to a runlevel.
Goals
In this two-part tutorial, we will see how to configure a Linux service to automatically start when the system reboots or crashes.
This installment of the series, Part 1, will be a quick run though of how to do it in three different init (initialization) modes:
- System V init (also known as classic init)
- Upstart
- systemd
In Part 2, we will explain why we ran the commands, and how they work behind the scenes. We will talk about startup scripts, important files, and configuration parameters for each init method. A lot of the discussion in Part 2 may seem theoretical, but will serve as useful reference for understanding the basics.
Part 1 will cover just the practical aspects of setting up automatic restarting.
Prerequisites
To follow this tutorial, you will need to create a number of DigitalOcean Droplets (or create your own Linux servers), each with at least 1 GB of RAM. We won't go into the details of creating a Droplet, but you can find more information here.
We will use different distributions for our examples.
- Debian 6 x64 (this older OS is needed to demonstrate the System V init system)
- Ubuntu 14.04 x64 (for Upstart)
- CentOS 7 x64 (for systemd)
- You should set up a sudo user on each server. To understand how sudo privileges work, see this DigitalOcean tutorial about enabling sudo access
We advise you to keep the Droplets after following Part 1 of this tutorial, since we will use the same setup for Part 2.
You should not run any commands, queries, or configurations from this tutorial on a production Linux server. We're going to disrupt services as part of testing, and you wouldn't want your live server to hiccup.
Auto-starting Services with System V
Let's start our discussion with System V init, the oldest init system discussed here.
- Debian 6 and earlier
- Ubuntu 9.04 and earlier
- CentOS 5 and earlier
With System V, most standard applications you can install, such as Nginx or MySQL, will start after rebootby default, but NOT start after a crash by default. They will come with their own init scripts in/etc/init.d already.
For custom applications, you'll have to create your own init scripts and enable the services to start automatically on your own.
Creating your own init script is beyond the scope of this article, but you can reference existing example scripts to help you build your own, should you need it. System V uses Bash for init scripts.
Auto-start Checklist for System V
This section is a quick reference to make sure your service is set to automatically start.
Configuration Checklist
-
Make sure the service has a functional Bash init script located at
/etc/init.d/service -
Use the
update-rc.dcommand to enable the service (or for a CentOS system,chkconfig):
-
sudo update-rc.d service enable
-
This should create a symlink in
/etc/rc2.dthat looks like the following (do NOT create this manually):
lrwxrwxrwx 1 root root 15 Jul 31 07:09 S02mysql -> ../init.d/service
Note that you should also see links from directories /etc/rc3.d through /etc/rc5.d; learn more about these numbers when we discuss runlevels.
-
Add a
respawnline for this service at the bottom of the/etc/inittabfile. Here's a generic example:
/etc/inittab
id:2345:respawn:/bin/sh /path/to/application/startup
- Stop, then start, the service:
-
sudo service service stop -
sudo service service start
- Reboot the server.
-
sudo reboot
Test
To test that these are working, you can:
- Reboot the server, then verify that the service is up
- Search for the process number:
-
ps -ef | grep service
- Kill the process:
-
sudo kill -9 process_number
- Wait five minutes, then verify that the service is back up
Step 1 — Connecting to Your Debian 6 Droplet
Now we'll run through a practical example, using MySQL.
From the DigitalOcean control panel, create a Debian 6.0 x64 Droplet with 1 GB of RAM.
Once the Droplet has been initialized, use SSH to connect to the server (Windows users can connect using a tool like PuTTY).
-
ssh sammy@your_server_ip
In the following instructions, we assume your account has sudo privileges.
Step 2 — Installing MySQL
We'll use MySQL as our test service. Execute the next command to install MySQL Server:
-
sudo apt-get install mysql-server -y
A graphical screen like the one shown below will appear asking for a new root password. Provide that:
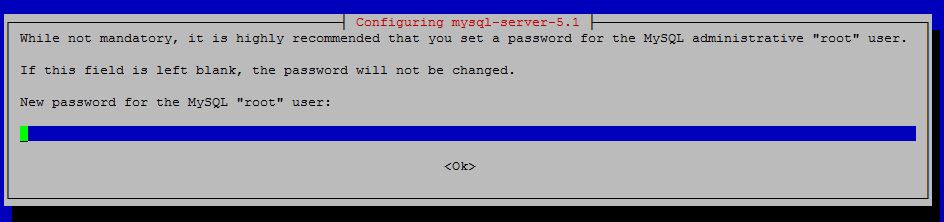
Repeat the password in the next prompt:
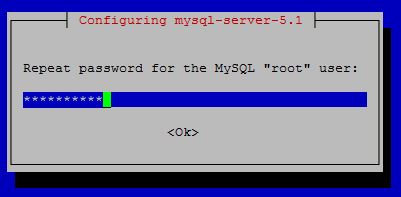
Press ENTER to confirm.
Lines will scroll by as MySQL is installed. Once the installation completes, run the following command to harden your installation:
-
mysql_secure_installation
This will ask for the current root password. Press N to keep the same password. Then, press Y to remove the anonymous user, disable remote root login, and remove the test database. Finally, press Y to reload the privilege tables.
Our MySQL installation should now be complete.
To check if the service is running, execute this command:
-
service mysql status
The output will show a few lines of information, one of which will show how long the MySQL service has been running (uptime).
Output
/usr/bin/mysqladmin Ver 8.42 Distrib 5.1.73, for debian-linux-gnu on x86_64 . . . Uptime: 4 days 18 hours 58 min 27 sec Threads: 1 Questions: 18 Slow queries: 0 Opens: 15 Flush tables: 1 Open tables: 8 Queries per second avg: 0.0.
Step 3 — Configuring MySQL to Auto-start After Reboot
By default, MySQL is already set to start after a reboot.
You should see this symlink to MySQL's init script in the /etc/rc2.d directory. Note that you should NOTtry to create these symlinks manually; use the update-rc.d command to enable and disable services.
-
ls -l /etc/rc2.d
Output
lrwxrwxrwx 1 root root 15 Jul 31 07:09 S02mysql -> ../init.d/mysql
As long as there is an S script under the default runlevel directory for the service, init will start the service when the server boots.
So, MySQL should be running. Now it's time to verify that it will auto-start at boot time. Reboot the machine with this command:
-
sudo reboot
Once the server comes back online, connect to it with SSH.
Run the service mysql status command again. Again, the service will be shown as running. This means the service automatically starts when the operating system boots.
Not all services will be like this, though. In those cases we will have to manually configure the services for auto-restart. For Debian, the update-rc.d command lets you add (or remove) services to be automatically started at boot.
Let's disable the MySQL service and then see how to re-enable it for auto start. Let's run this command to disable MySQL:
-
sudo update-rc.d mysql disable
To test, reboot the server again.
-
sudo reboot
Connect to your server with SSH.
Try to connect to MySQL using the MySQL client tool:
-
mysql -u root -p
You will receive this message:
Output
ERROR 2002 (HY000): Can't connect to local MySQL server through socket '/var/run/mysqld/mysqld.sock' (2)
Re-enable the service:
-
sudo update-rc.d mysql enable
The output will be:
Output
update-rc.d: using dependency based boot sequencing
If you are running a CentOS system with System V, the commands will use chkconfig rather thanupdate-rc.d.
Note that enabling a service for auto-start at boot time does not automatically start it if it is stopped. To start MySQL, run this command:
-
sudo service mysql start
Step 4 — Configuring MySQL to Auto-start After Crash
Now that our service is running again, let's see if it automatically starts after a crash. With System V, it willNOT come up automatically by default.
We will emulate a crash by killing the process abruptly. Find its process ID by executing the following command:
-
ps -ef | grep mysql
The output will be similar to this:
Output
root 1167 1 0 07:21 pts/0 00:00:00 /bin/sh /usr/bin/mysqld_safe mysql 1292 1167 0 07:21 pts/0 00:00:00 /usr/sbin/mysqld --basedir=/usr --datadir=/var/lib/mysql --user=mysql --pid-file=/var/run/mysqld/mysqld.pid --socket=/var/run/mysqld/mysqld.sock --port=3306 root 1293 1167 0 07:21 pts/0 00:00:00 logger -t mysqld -p daemon.error root 1384 1123 0 07:21 pts/0 00:00:00 grep mysql
The main processes that run MySQL are mysqld_safe and mysqld. mysqld_safe is the parent process of mysqld.
In our example here, we can see they have process IDs 1167 and 1292 respectively. Their process numbers are highlighted in red above.
Let's emulate a crash with a kill -9 command. Make sure to use your own process IDs:
-
sudo kill -9 1167 -
sudo kill -9 1292
Check the service status:
-
sudo service mysql status
The output will show that the service has stopped:
Output
MySQL is stopped..
Now that our service has crashed, how do we bring it up? Of course we can restart it, but that would be a manual process; we want restarting to be automatic. To make MySQL auto restart after a crash, we have to edit the /etc/inittab file.
We will talk about the /etc/inittab file in greater detail in Part 2, but for now, let's understand that it's the first file System V init reads when booting up.
Among other things, /etc/inittab decides how a process should behave if it crashes. For some processes it's meant to respawn the service again. We need to ensure MySQL is among those services. So let's make a copy of it first:
-
sudo cp /etc/inittab /etc/inittab.orig
A note of caution: be extremely careful when editing the /etc/inittab file. If you make a mistake in your commands or delete any existing configuration, the system may not come up when you reboot it.
Open /etc/inittab with a text editor:
-
sudo nano /etc/inittab
At the end of the file, add this line:
/etc/inittab
ms:2345:respawn:/bin/sh /usr/bin/mysqld_safe
So what are we doing here?
Well, we are putting a command in the /etc/inittab file to respawn the mysqld_safe processwhen it crashes. It has four fields, each one separated from the other by a colon (:).
-
ms:The first two characters specify an id for the process. -
2345:The second field specifies the runlevels it's supposed to apply to. In this case, it's for runlevels 2, 3, 4, and 5 -
respawn:The third field specifies the action (we are respawning the service) -
/bin/sh /usr/bin/mysqld_safe: Finally, the fourth field is the process (the command to execute)
We'll come back to the /etc/inittab file in more detail in Part 2, and see how it helps with auto-starting MySQL after a crash. For now, save the file and exit the editor.
Start the service again:
-
sudo service mysql start
Reboot the server so the change takes effect:
-
sudo reboot
Now, repeat the commands to locate the process numbers, kill the processes, and check the status again, starting with ps -ef | grep mysql.
Wait for five minutes or so and then execute the command:
-
sudo service mysql status
You should see that this time, MySQL has started automatically after the crash.
That's it! MySQL will now automatically start after a service crash or system reboot.
Auto-starting Services with Upstart
Upstart is another init method, which was first introduced in Ubuntu 6. It became the default in Ubuntu 9.10, and was later adopted into RHEL 6 and its derivatives. Google's Chrome OS also uses Upstart.
- Ubuntu 9.10 to Ubuntu 14.10, including Ubuntu 14.04
- CentOS 6
While it's going strong on the current LTS version of Ubuntu (14.04 at the time of writing), it's being phased out everywhere in favor of systemd, which we cover in the last section.
Upstart is better than System V in handling system services, and it's also easy to understand. However, we will not dive deeply into Upstart in this part of the tutorial; there is a very good tutorial on Upstart in the DigitalOcean community.
Today we will primarily focus on Upstart configuration files and see how to use them to auto-start services.
Upstart uses configuration files to control services. The files are under the /etc/init directory. The files have plain text content with easy-to-read sections called stanzas. Each stanza describes a different aspect of the service and how it should behave.
By default, most standard applications you can install, such as Nginx or MySQL, will start after reboot and also start after a crash by default, so you don't have to do anything to make this work. They will come with their own init scripts in /etc/init already.
For custom applications, you will have to set this up yourself. To learn how to create your own custom Upstart script, read the introductory Upstart tutorial referenced earlier.
Auto-start Checklist for Upstart
This section is a quick reference to make sure your service is set to automatically start.
Configuration Checklist
-
Make sure the service has a functional Upstart init script located at
/etc/init/service.conf-
The
/etc/init/service.conffile should contain a line likestart on runlevel [2345]to enable automatic starting after a reboot -
The
/etc/init/service.conffile should also contain a line likerespawnto enable the service to respawn after a crash
-
The
-
Make sure there is no override file for the service:
/etc/init/service.override
(There would be one only if you or another admin made one earlier)
- Stop, then start, the service:
-
sudo initctl stop service -
sudo initctl start service
- Reboot the server.
-
sudo reboot
Test
To test that these are working, you can:
- Reboot the server, then verify that the service is up
- Search for the process number:
-
ps -ef | grep service
- Kill the process:
-
sudo kill -9 process_number
- Within a few seconds, verify that the service is back up
Step 1 — Connecting to Your Ubuntu 14.04 Droplet
We'll use an Ubuntu 14.04 server, running MySQL, to demonstrate Upstart.
Create a Droplet with 1 GB of RAM and choose Ubuntu 14.04 x64 as the base image.
Connect to the server with SSH (Windows users can connect using a tool like PuTTy).
-
ssh sammy@your_server_ip
In the following instructions, we assume your account has sudo privileges.
Step 2 — Installing MySQL
Now we'll install MySQL.
Execute the next command to update the package list:
-
sudo apt-get update
Install MySQL Server:
-
sudo apt-get install mysql-server -y
Create a new root password for MySQL, and confirm it when prompted.
Once the installation completes, run the mysql_secure_installation command:
-
mysql_secure_installation
Provide the same answers to the prompts as you did before when installing in Debian (see the earlier section).
Step 3 — Configuring MySQL to Auto-start After Reboot
By default, MySQL will automatically start after a reboot. It's useful to look at its configuration so you can set up your own services this way.
First of all, let's check whether the MySQL server process is running:
-
sudo initctl status mysql
You should see output like this:
Output
mysql start/running, process 2553
Reboot the server:
-
sudo reboot
When the server comes back online, use SSH to reconnect.
Check MySQL's status:
-
sudo initctl status mysql
The output will show that MySQL has automatically started. So, we don't have to do anything specific here to enable the service.
Keep in mind that may not be the case for other application daemons where you have to manually enable the service by creating your own Upstart file in the /etc/init/ directory.
Also, how does Upstart know MySQL should auto-start at reboot?
Let's take a look at MySQL's Upstart init file. Open the /etc/init/mysql.conf file in a text editor:
-
sudo nano /etc/init/mysql.conf
An Upstart file is not a shell script like we saw on our Debian machine.
The init configuration file for MySQL will have script blocks for pre-start and post-start events. These code blocks tell the Upstart system what to execute when the mysqld process is coming up or has already come up.
Let's take a closer look at the first ten lines of the file:
/etc/init/mysql.conf
...
description     "MySQL Server"
author          "Mario Limonciello <[email protected]>"

start on runlevel [2345]
stop on starting rc RUNLEVEL=[016]

respawn
respawn limit 2 5
We can see MySQL is supposed to start on runlevels 2, 3, 4 and 5, and it's not supposed to run on runlevels 0, 1 and 6.
This is where we define service start-up behaviour for an Upstart daemon. Unlike System V where we used the update-rc.d or chkconfig commands, we use service configuration files in Upstart. All we have to do is to add/change the start stanza. In Part 2, we will play with this file and see how enabling and disabling the MySQL service affects this file, and vice-versa.
The respawn directives restart the service after a crash, so we'll discuss them in the next step.
Step 4 — Configuring MySQL to Auto-start After Crash
You should still have /etc/init/mysql.conf open.
The respawn directive is self-explanatory: MySQL will start if it crashes. This is already enabled by default.
The directive after that is more interesting: the respawn limit directive stipulates how many times Linux will try to restart the crashed service in an interval specified in seconds. In this case, the first argument (2) is the number of tries, and the second one (5) is the interval. If the service does not start up (respawn) successfully within this threshold, it will be kept in a stopped state. This sane default behavior because if a service is crashing continuously, it's better to disable it than affect your entire system's stability.
For now, exit the text editor without making any changes.
As we have just seen, by default MySQL is also configured to come back automatically after a crash.
To test this, let's check the service PID:
-
sudo initctl status mysql
The new PID (after reboot) for our system should look like this:
Output
mysql start/running, process 961
Note the process ID for your test case. Next, emulate a crash by killing the process with a kill -9command, using your own process number:
-
sudo kill -9 961
Check the MySQL status now. It should be running (immediately or within a few seconds) with a new PID:
-
sudo initctl status mysql
In our case the new PID is 1552:
Output
mysql start/running, process 1552
If you'd like, you can kill it again. It will come up again each time:
This is happening because of the respawn directive in the mysql.conf file.
/etc/init/mysql.conf
respawn
MySQL comes with the ability to restart after a crash by default, but for other services you may have to add this directive manually in the Upstart file. Again, in Part 2, we will see how we can change the crash behaviour from the config file.
Auto-starting Services with systemd
systemd is a system and service manager for Linux which has become the de facto initialization daemon for most new Linux distributions.
First implemented in Fedora, systemd now comes with RHEL 7 and its derivatives like CentOS 7. Ubuntu 15.04 ships with native systemd as well. Other distributions have either incorporated systemd, or announced they will soon.
- Debian 7 and Debian 8
- Ubuntu 15.04
- CentOS 7
systemd is backwards-compatible with System V commands and initialization scripts.
That means any System V service will also run under systemd. Most Upstart and System V administrative commands have been modified to work under systemd. That's why it's often referred to as a drop-in replacement for System V init.
With systemd, most standard applications you can install, such as Nginx or MySQL, will start after rebootand also start after a crash by default, so you don't have to do anything to make this work. They will come with their own init scripts in /etc/systemd/system already.
For custom applications, you'll have to create your own init scripts and enable the services to start automatically on your own. We won't go into the specifics of what goes into a custom init script in detail here, but you can read more about systemd in this introductory systemd article.
Auto-start Checklist for systemd
This section is a quick reference to make sure your service is set to automatically start.
Configuration Checklist
-
Make sure the service has a functional systemd init script located at
/etc/systemd/system/multi-user.target.wants/service.service -
Use the
systemctlcommand to enable the service:
-
sudo systemctl enable service.service
-
This should create a symlink in
/etc/systemd/system/multi-user.target.wants/that looks like the following (do NOT create this manually):
lrwxrwxrwx 1 root root 38 Aug 1 04:43 /etc/systemd/system/multi-user.target.wants/service.service -> /usr/lib/systemd/system/service.service
This will enable automatic starting after a reboot.
-
The
/etc/systemd/system/multi-user.target.wants/service.servicefile should also contain a line likeRestart=alwaysunder the[Service]section of the file to enable the service to respawn after a crash - Reload the systemd daemon, followed by a restart of the service:
-
sudo systemctl daemon-reload -
sudo systemctl restart service.service
Test
To test that these are working, you can:
- Reboot the server, then verify that the service is up
-
sudo reboot
- Search for the process number:
-
ps -ef | grep service
- Kill the process:
-
sudo kill -9 process_number
- Within a few seconds, verify that the service is back up
Step 1 — Connecting to Your CentOS 7 Droplet
We'll use CentOS 7 and MySQL to show you how to configure systemd services.
Create a Droplet with 1 GB of RAM and choose CentOS 7 x64 as its base image.
Use SSH to connect to the server (Windows users can connect using a tool like PuTTy).
-
ssh sammy@your_server_ip
We assume you are using an account with sudo privileges.
Step 2 — Installing MySQL
Run the following commands to download and install the MySQL Community server repo:
-
sudo wget http://repo.mysql.com/mysql-community-release-el7-5.noarch.rpm
-
sudo rpm -ivh mysql-community-release-el7-5.noarch.rpm
Install MySQL server:
-
sudo yum install mysql-server -y
Once the installation completes, start the mysqld service.
(Note that this is not the same as when we installed MySQL under Debian and Ubuntu. In the other distributions, MySQL started automatically.)
Also, we are using a new systemd command called systemctl to control the service:
-
sudo systemctl start mysqld
Next, run the mysql_secure_installation command.
-
mysql_secure_installation
In this case the MySQL root password will be empty, so you should choose to create a new password. Provide the same answers to the other prompts as you did when installing under Debian or Ubuntu (see the earlier Debian section for details).
Step 3 — Configuring MySQL to Auto-start After Reboot
By default, MySQL is configured to start automatically after a reboot. Let's look at how this works.
To check whether the mysqld daemon was configured to start automatically at boot time, execute thesystemctl command with the is-enabled option:
-
sudo systemctl is-enabled mysqld.service
The result will be:
Output
enabled
Let's reboot the machine:
-
sudo reboot
When the server comes back up, connect to it with SSH.
Execute the following command to check the service status:
-
sudo systemctl status mysqld.service
The output will show the service is running:
Output
mysqld.service - MySQL Community Server Loaded: loaded (/usr/lib/systemd/system/mysqld.service; enabled) Active: active (running) since Fri 2015-07-31 21:58:03 EDT; 1min 52s ago Process: 662 ExecStartPost=/usr/bin/mysql-systemd-start post (code=exited, status=0/SUCCESS) Process: 625 ExecStartPre=/usr/bin/mysql-systemd-start pre (code=exited, status=0/SUCCESS) Main PID: 661 (mysqld_safe) ...
To disable the service, run the following command:
-
sudo systemctl disable mysqld.service
This will not stop the service, but disable it. In fact, the output shows the symbolic links have been deleted:
Output
rm '/etc/systemd/system/multi-user.target.wants/mysqld.service' rm '/etc/systemd/system/mysql.service'
If you'd like, you can reboot the server and test again to see if the MySQL server is running (it won't be).
Or, execute systemctl is-enabled again; we should get a response of disabled:
-
sudo systemctl is-enabled mysqld.service
Output
disabled
Enable the service again:
-
sudo systemctl enable mysqld.service
The output will show the symlinks being recreated:
Output
ln -s '/usr/lib/systemd/system/mysqld.service' '/etc/systemd/system/mysql.service' ln -s '/usr/lib/systemd/system/mysqld.service' '/etc/systemd/system/multi-user.target.wants/mysqld.service'
Your service will automatically start after a reboot.
Step 4 — Configuring MySQL to Auto-start After Crash
Now we will see how MySQL is configured to auto-start after a crash.
First, open the mysqld.service unit file in an editor (remember, systemd services use unit files for configuration):
-
sudo nano /etc/systemd/system/multi-user.target.wants/mysqld.service
At the end of the file, there is a directive for restart:
/etc/systemd/system/multi-user.target.wants/mysqld.service
[Unit]
...

[Install]
...

[Service]
...
...
Restart=always
...
The value of the Restart parameter is set to always. This means MySQL service will restart for clean or unclean exit codes or timeouts.
That's where an automatic restart is defined in systemd.
Just like the respawn directive in Upstart, the Restart parameter in systemd defines how the service should behave if it crashes.
Not all systemd services have this capability enabled by default; to make a service come up after a crash, all we have to do is to add this extra directive under the [Service] section of the service unit file. If the section header does not exist, we have to add the [Service] header too.
To emulate a crash, first exit the editor and then check the MySQL process ID:
-
sudo systemctl status mysqld.service
Output
mysqld.service - MySQL Community Server Loaded: loaded (/usr/lib/systemd/system/mysqld.service; enabled) Active: active (running) since Fri 2015-07-31 21:58:03 EDT; 1h 7min ago Main PID: 661 (mysqld_safe) ...
Kill this process with a kill -9 signal. In our case the main PID is 661; replace the PID with your own:
-
sudo kill -9 661
Check the status:
-
sudo systemctl status mysqld.service
The output will show that MySQL has restarted with a new PID (in our case the new Process ID is 11217):
Output
mysqld.service - MySQL Community Server Loaded: loaded (/usr/lib/systemd/system/mysqld.service; enabled) Active: active (running) since Fri 2015-07-31 23:06:38 EDT; 1min 8s ago Process: 11218 ExecStartPost=/usr/bin/mysql-systemd-start post (code=exited, status=0/SUCCESS) Process: 11207 ExecStartPre=/usr/bin/mysql-systemd-start pre (code=exited, status=0/SUCCESS) Main PID: 11217 (mysqld_safe) ... ...
So you see that the service comes up even after a crash.
Conclusion
In this first part of the tutorial, we have seen how System V, Upstart, and systemd services can be configured to auto-start after a reboot or crash.
We have also seen the files, configuration parameters, and commands that control this behavior.
This was more of a hands-on introduction. We will cover the concepts and basics in greater detail in the next installment of the series.
Revisions
- February 29, 2016 @ 17:47:45 [Current Revision] by admin
- February 29, 2016 @ 17:47:45 by admin
No comments yet.