
Here we'll show you how to manually assign DNS (Domain Name Service) servers for your Internet connection using OS X 10.6
-
Open System Preferences (either by clicking the icon on the dock or by clicking the Apple Icon and selecting it from the list).
-
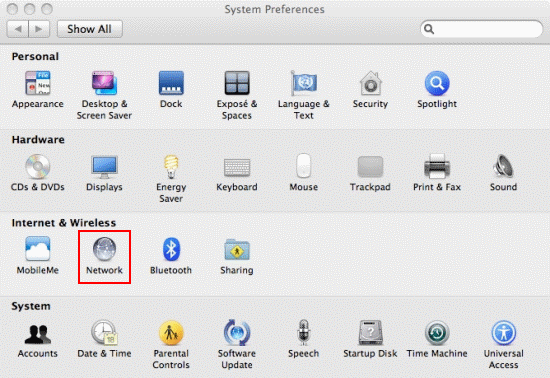
Double-click the Network icon.
-
Double-click the connection you want to change DNS for. The connection you're using now will have a green light next to it. In this example we'll be changing the DNS on the AirPort connection.

-
On the connection properties window, click the DNS tab.

-
Use the + or – symbols to add or remove the DNS servers your connection uses. Servers will be used in the order they are shown in this list.
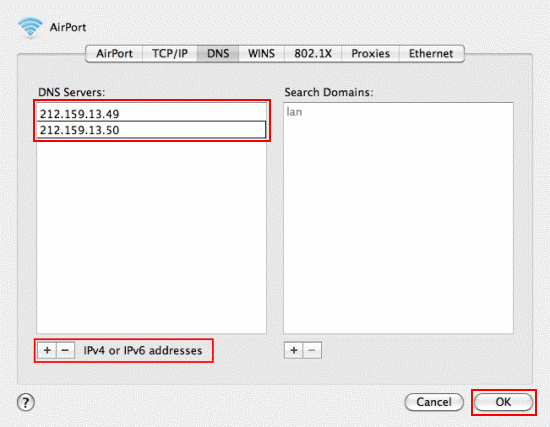
We recommend using the following server addresses:
8.8.8.8
8.8.4.4
When you've finished, click OK. - Now you'll be back at the Connection properties screen. Click OK to finish.
Revisions
- April 15, 2016 @ 16:38:15 [Current Revision] by admin
- April 15, 2016 @ 16:38:15 by admin
- April 15, 2016 @ 16:38:03 by admin
- April 15, 2016 @ 16:37:36 by admin
- April 15, 2016 @ 16:36:31 by admin
No comments yet.