
PHP (recursive acronym for PHP: Hypertext Preprocessor) is an open source, popular general-purpose scripting language that is widely-used and best suited for developing websites and web-based applications. It is a server-side scripting language that can be embedded in HTML.
Currently, there are three supported versions of PHP, i.e PHP 5.6, 7.0 and 7.1. Meaning PHP 5.3, 5.4 and 5.5have all reached end of life; they are no longer supported with security updates.
In this article, we will explain how to install all the supported versions of PHP in Ubuntu and its derivatives with most requested PHP extensions for both Apache and Nginx web servers using a Ondřej Surý PPA. We will also explain how to set default version of PHP to be used on the Ubuntu system.
Note that PHP 7.x is the supported stable version in the Ubuntu software repositories, you can confirm this by running the apt command below.
$sudo apt show phpOR$ sudo apt show php -a
To install the default PHP version from the Ubuntu software repositories, use the command below.
$ sudo apt install php
Install PHP (5.6, 7.0, 7.1) on Ubuntu Using PPA
1. First start by adding Ondřej Surý PPA to install different versions of PHP – PHP 5.6, PHP 7.0 and PHP 7.1 on Ubuntu system.
$ sudo apt install python-software-properties
$ sudo add-apt-repository ppa:ondrej/php
2. Next, update the system as follows.
$ sudo apt-get update
3. Now install different supported versions of PHP as follows.
For Apache Web Server
$ sudo apt install php5.6   [PHP 5.6]
$ sudo apt install php7.0   [PHP 7.0]
$ sudo apt install php7.1   [PHP 7.1]
$ sudo apt install php7.2   [PHP 7.2]
$ sudo apt install php7.3   [PHP 7.3]
For Nginx Web Server
$ sudo apt install php5.6-fpm   [PHP 5.6]
$ sudo apt install php7.0-fpm   [PHP 7.0]
$ sudo apt install php7.1-fpm   [PHP 7.1]
$ sudo apt install php7.2-fpm   [PHP 7.2]
$ sudo apt install php7.3-fpm   [PHP 7.3]
4. To install any PHP modules, simply specify the PHP version and use the auto-completion functionality to view all modules as follows.
------------ press Tab key for auto-completion ------------
$ sudo apt install php5.6
$ sudo apt install php7.0
$ sudo apt install php7.1
$ sudo apt install php7.2
$ sudo apt install php7.3
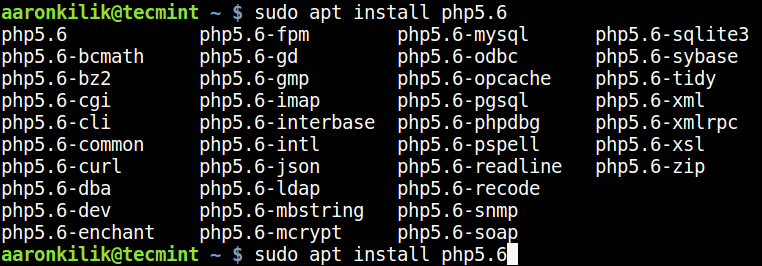
Search PHP Modules
5. Now you can install most required PHP modules from the list.
------------ Install PHP Modules ------------
$ sudo apt install php5.6-cli php5.6-xml php5.6-mysql
$ sudo apt install php7.0-cli php7.0-xml php7.0-mysql
$ sudo apt install php7.1-cli php7.1-xml php7.1-mysql
$ sudo apt install php7.2-cli php7.2-xml php7.2-mysql
$ sudo apt install php7.3-cli php7.3-xml php7.3-mysql
6. Finally, verify your default PHP version used on your system like this.
$ php -v

Check Default PHP Version in Ubuntu
Set Default PHP Version in Ubuntu
7. You can set the default PHP version to be used on the system with the update-alternatives command, after setting it, check the PHP version to confirm as follows.
------------ Set Default PHP Version 5.6 ------------
$ sudo update-alternatives --set php /usr/bin/php5.6
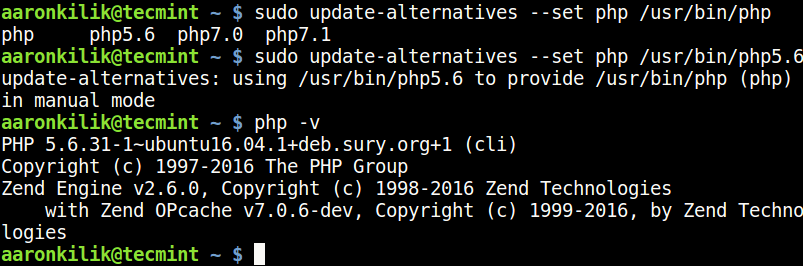
Set PHP 5.6 Version in Ubuntu
------------ Set Default PHP Version 7.0 ------------
$ sudo update-alternatives --set php /usr/bin/php7.0
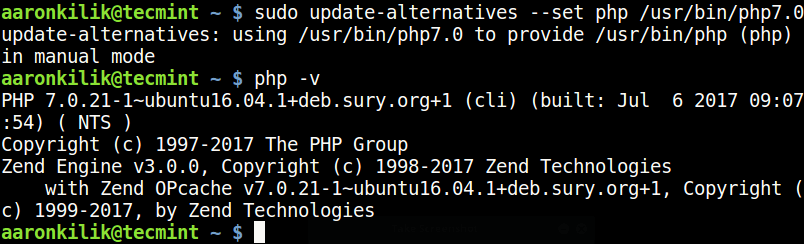
Set PHP 7.0 Version in Ubuntu
------------ Set Default PHP Version 7.1 ------------
$ sudo update-alternatives --set php /usr/bin/php7.1
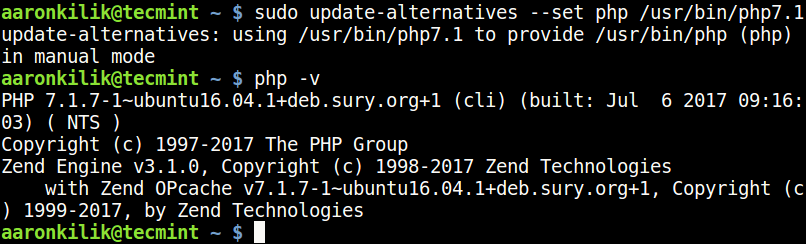
Set PHP 7.1 Version in Ubuntu
8. To set the PHP version that will work with Apache web server, use the commands below. First disable the current version with the a2dismod command and then enable the one you want with the a2enmod command.
$ sudo a2dismod php7.0
$ sudo a2enmod php7.1
$ sudo systemctl restart apache2

Enable Disable PHP Modules for Apache
9. After switching from one version to another, you can find your PHP configuration file, by running the command below.
------------ For PHP 5.6 ------------
$ sudo update-alternatives --set php /usr/bin/php5.6
$ php -i | grep "Loaded Configuration File"

------------ For PHP 7.0 ------------
$ sudo update-alternatives --set php /usr/bin/php7.0
$ php -i | grep "Loaded Configuration File"

------------ For PHP 7.1 ------------
$ sudo update-alternatives --set php /usr/bin/php7.1
$ php -i | grep "Loaded Configuration File"

------------ For PHP 7.2 ------------
$ sudo update-alternatives --set php /usr/bin/php7.2
$ php -i | grep "Loaded Configuration File"

------------ For PHP 7.3 ------------
$ sudo update-alternatives --set php /usr/bin/php7.3
$ php -i | grep "Loaded Configuration File"
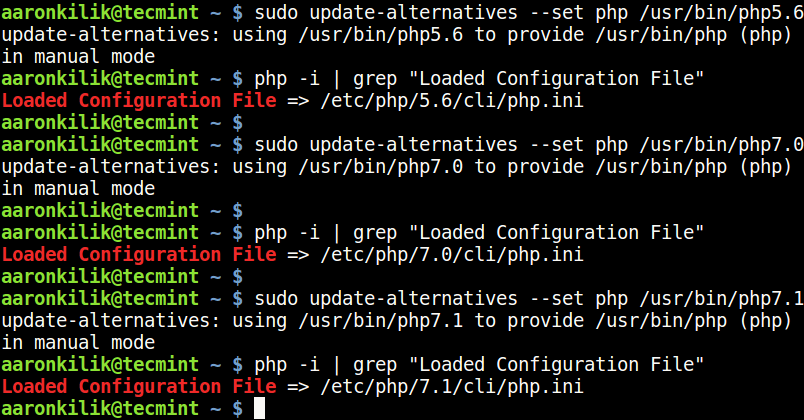
Find PHP Configuration File
Revisions
- May 14, 2019 @ 14:00:17 [Current Revision] by Sharing Solution
- May 14, 2019 @ 14:00:15 by Sharing Solution
Revision Differences
There are no differences between the May 14, 2019 @ 14:00:15 revision and the current revision. (Maybe only post meta information was changed.)
No comments yet.